Form Designer
Click here to view the current version of this documentation.
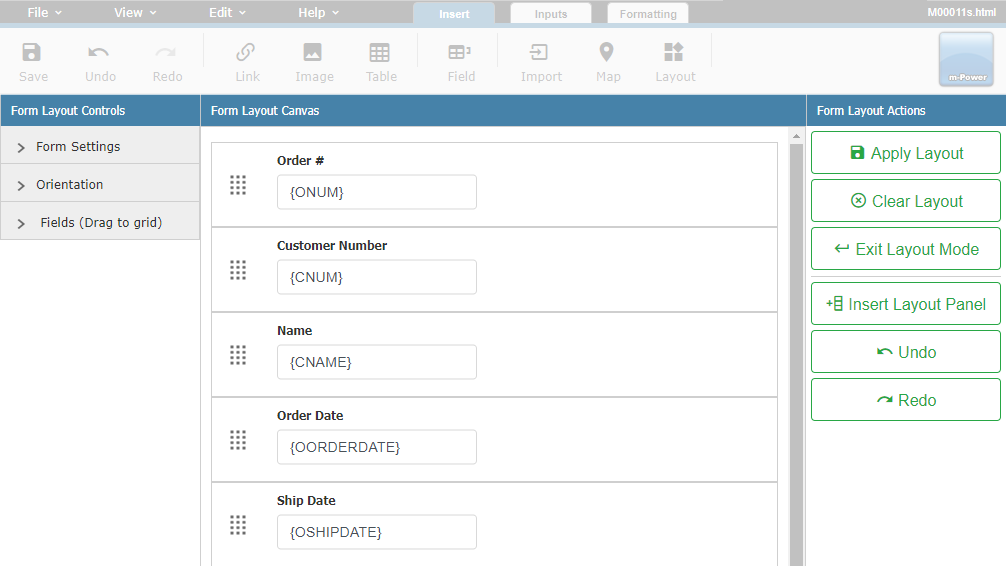
m-Power templates do a lot to make beautiful web applications right "out of the box". To compliment this, many developers take these aesthetics further by restructuring the page to maximize screen sizes real estate as well as page flow efficiency. However, restructuring the page layout typically requires going into the HTML source code. Often times this is a daunting task for the average m-Power developer. The Form Layout Designer removes the necessity to code in order to restructure your single record pages. A few key features of the Form Designer is the ability to reorder your fields by drag-and-drop, creating multiple columns to place fields, utilizing bootstrap card panels, and to change the orientation of the field's label placement.
Note: The Form Designer is only supported in Bootstrap themed dictionaries.
Enabling the Form Designer
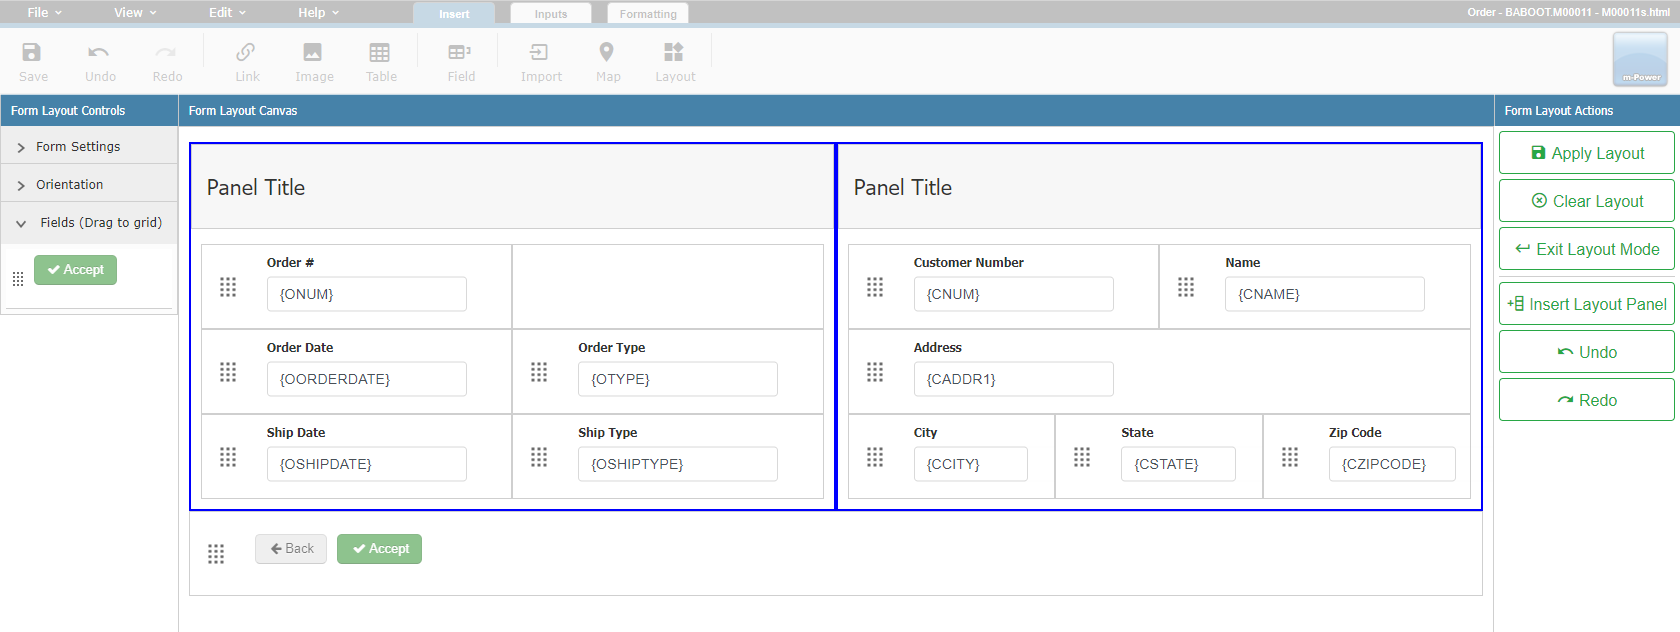
Clicking the 'Layout' button from the ribbon menu allows the developer to enter the Form Designer by selecting 'Form Layout'. Once inside the Form Designer, only Form Layout functions can be used. The m-Painter ribbon menu is disabled until you click the 'Apply Layout' or 'Exit Layout Mode' buttons to leave the Form Designer.
Note: You must save m-Painter after applying your new layout.
Form Row Layout
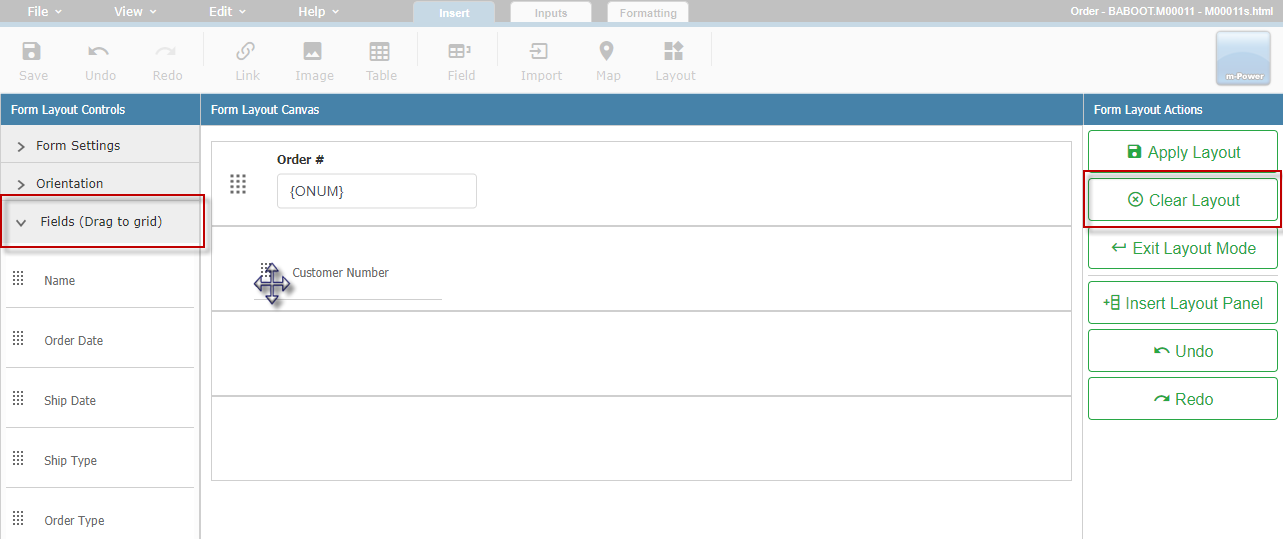
Clicking the 'Clear Layout' button on the right-side action menu will give the developer a clean canvas to work with. Using the Fields drill down on the left-side control menu, simply drag and drop the fields to the desired row.
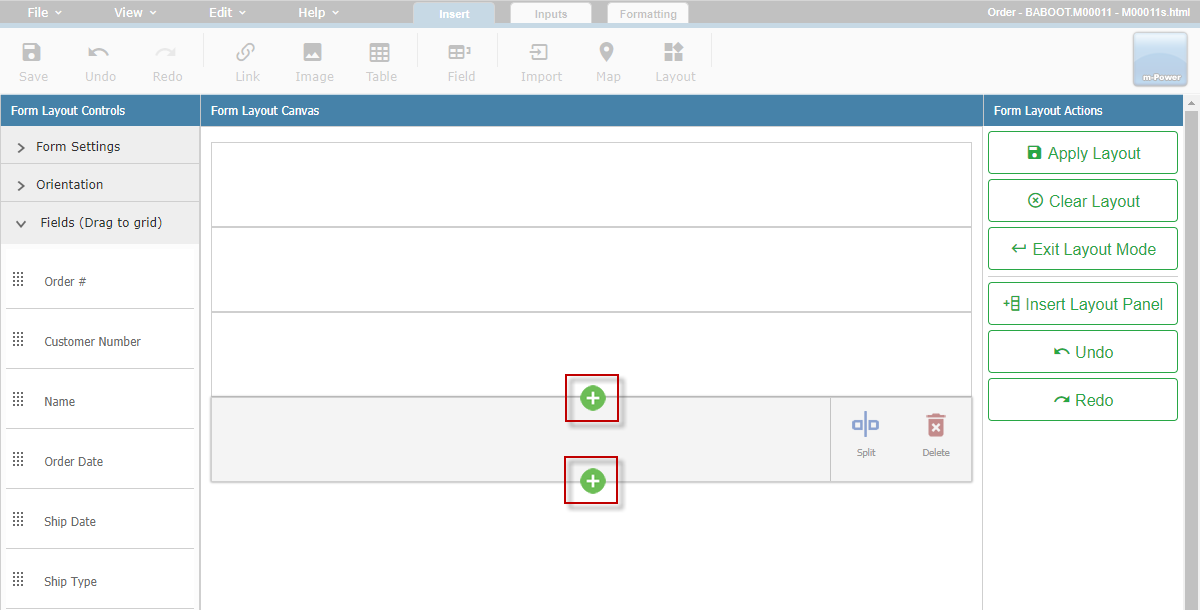
Insert new rows above or below the currently selected row as needed by clicking the green plus icon on the top or bottom border line.
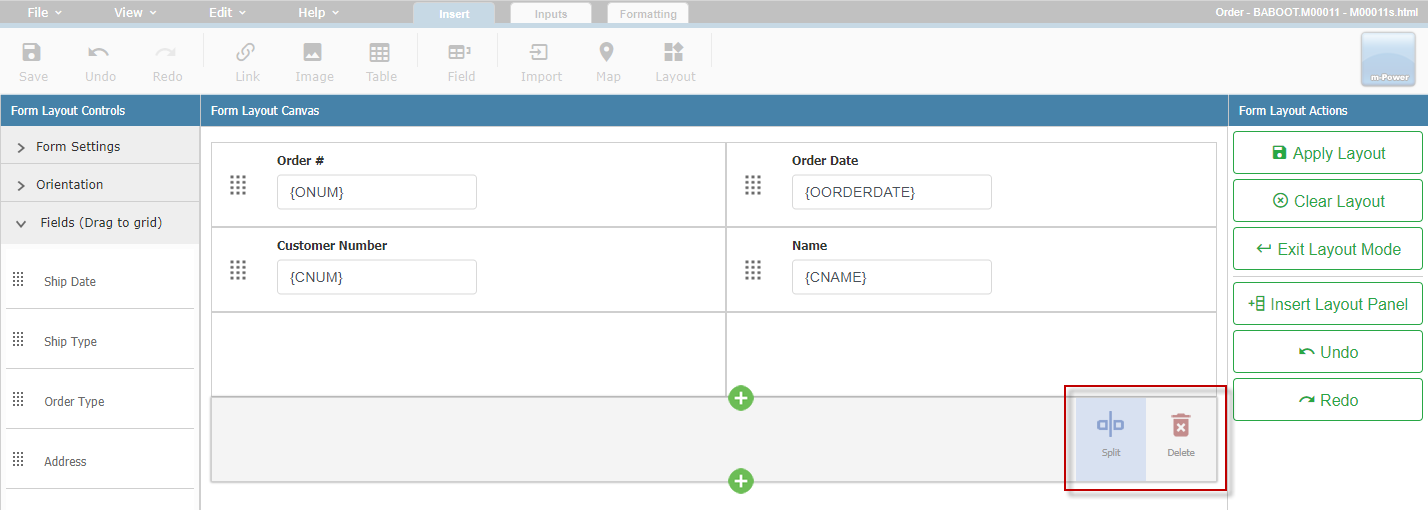
Split rows into equal columns using the 'Split' button to the right of the row. Delete a split column by clicking the 'Delete' button to the right of the row. If there are no split columns and only the row is present, clicking the 'Delete' button will delete that row.
Panel Layout
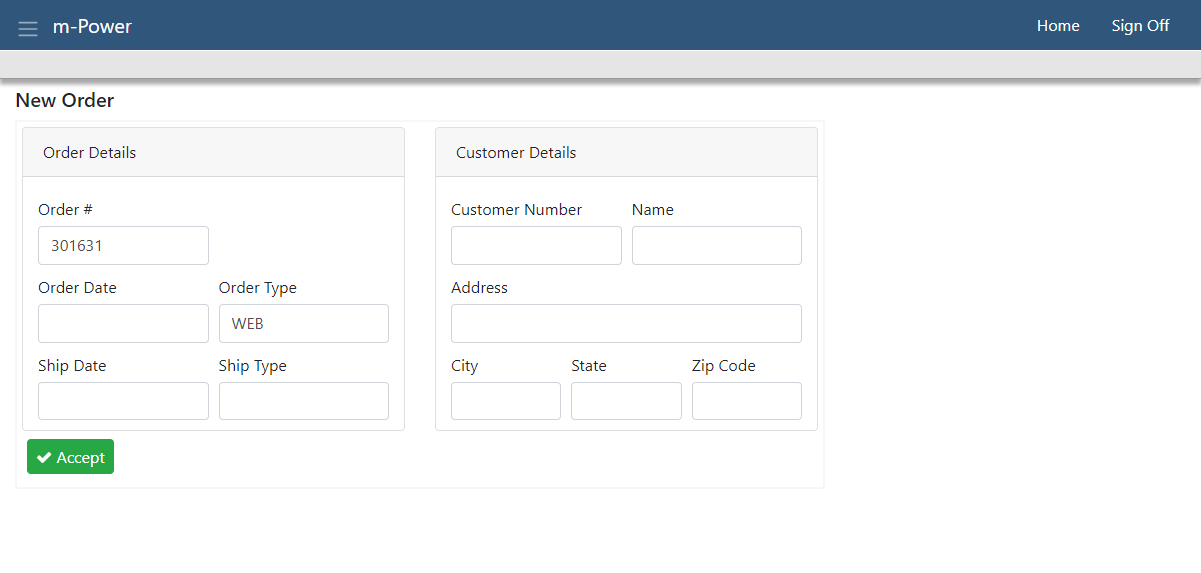
With the Form Layout screen, developers have the ability to organize their input fields into card panels. Click the 'Insert Layout Panel' on the right-side action menu.
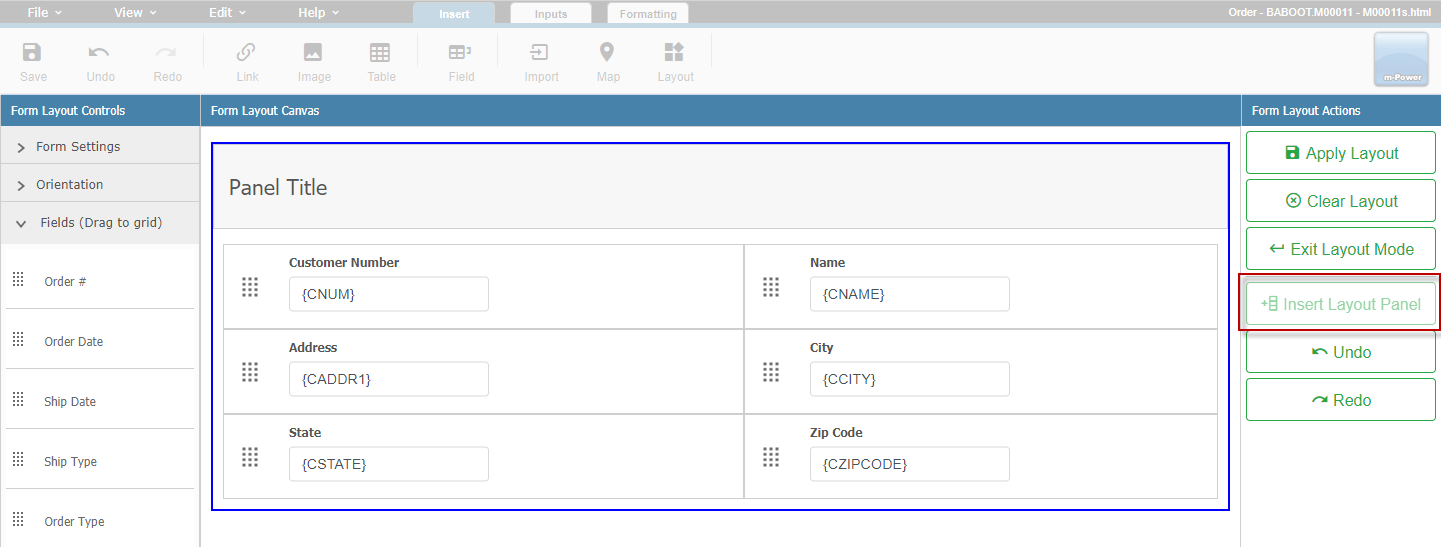
To insert another panel to the side of the existing, click the 'Split' button on the 'Panel Title' row.

To insert a card panel above/below the existing panel, click the green plus icon on the top/bottom border of the 'Panel Title' row.
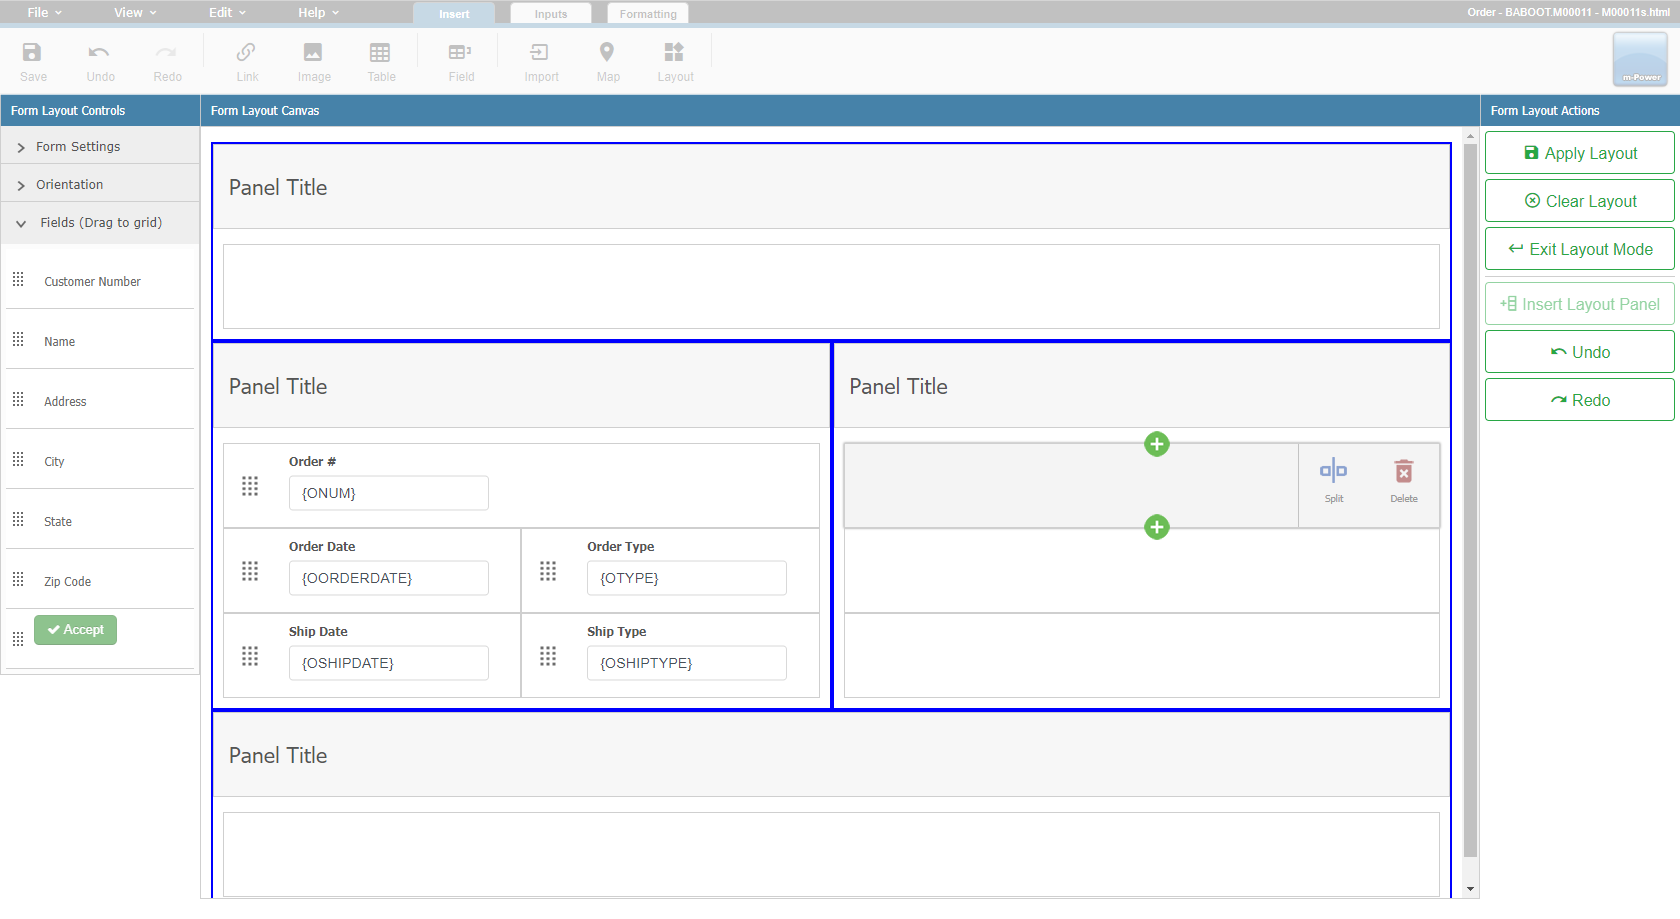
Note: You may change the text of the Panel Title once you apply the layout and are back in m-Painter proper.
Orientation
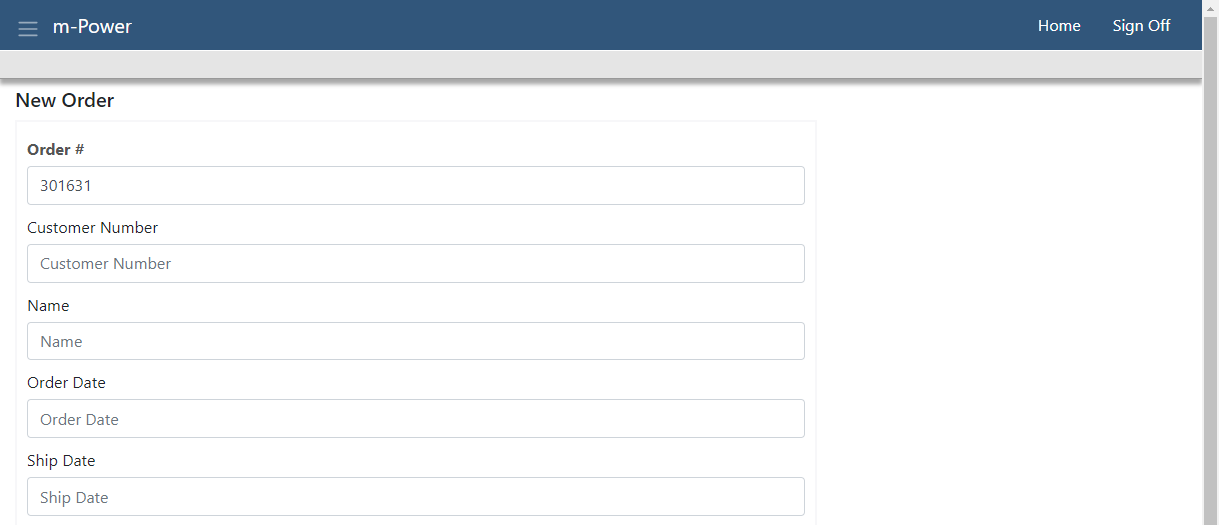
New templates default the form vertically where the label is above the input.
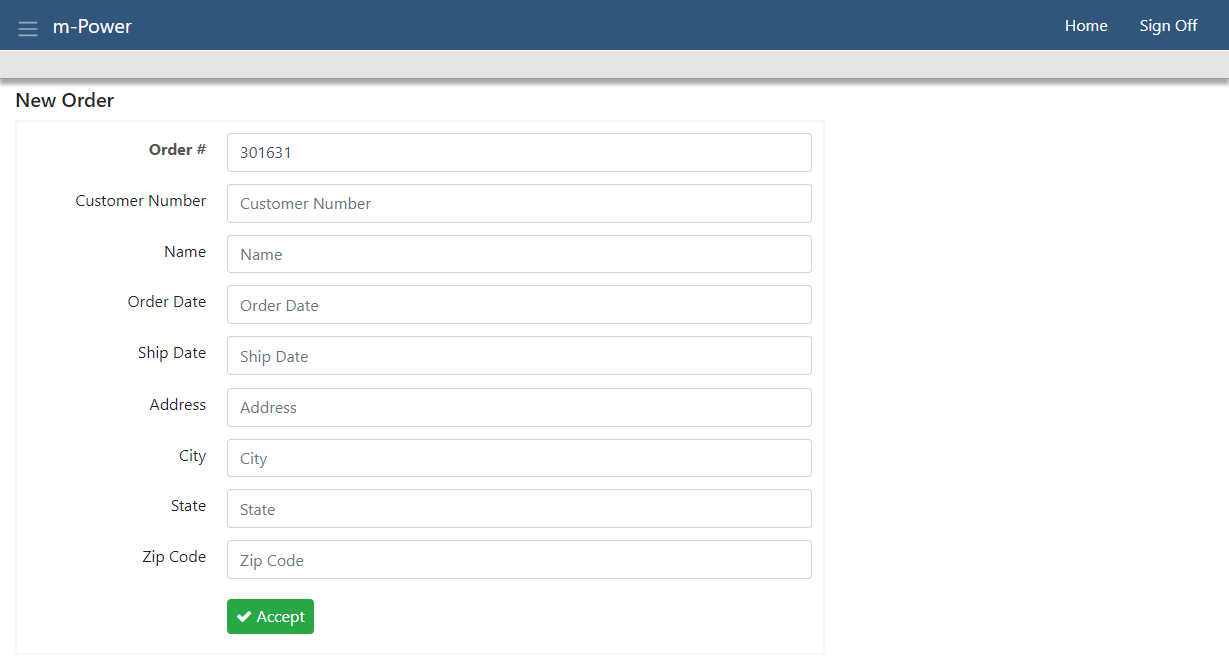
Changing the orientation to horizontal will move the form label to the left of the input.
Form Settings
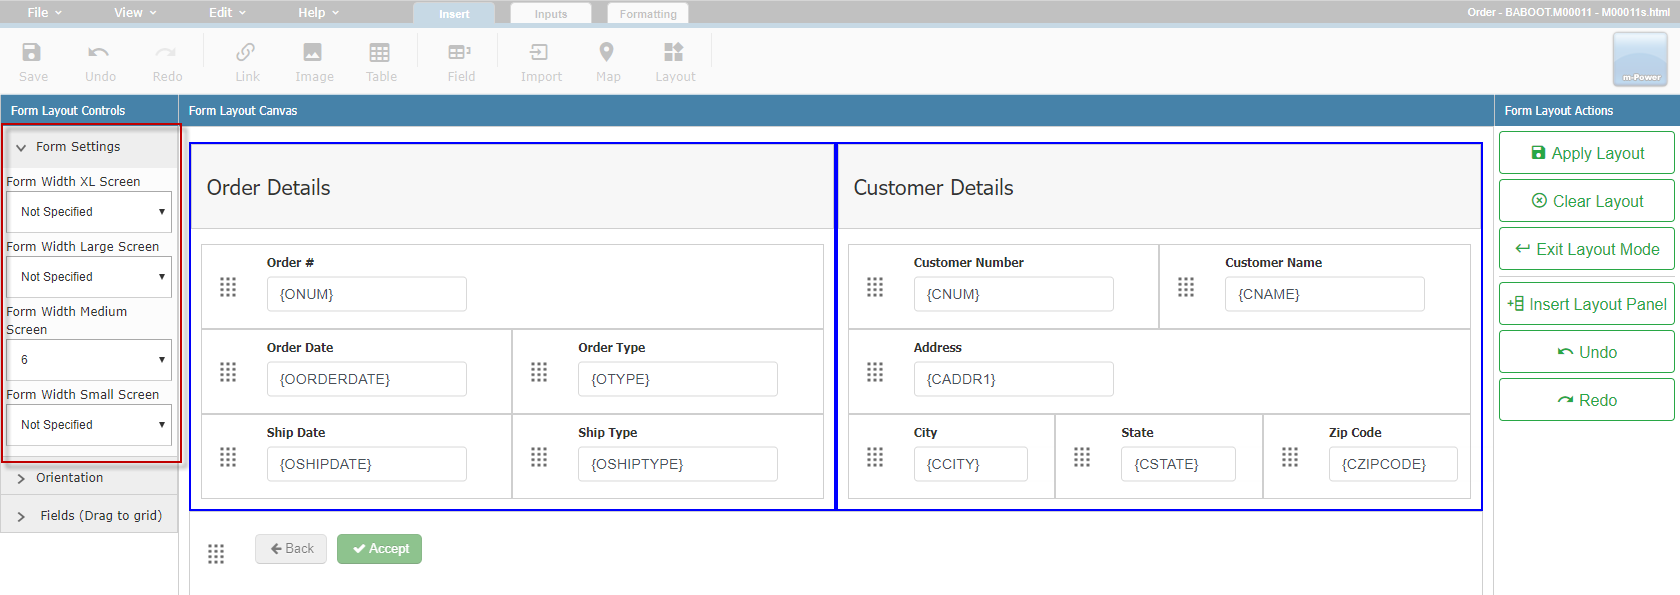
Using a bootstrap template gives us access to the innate bootstrap responsive logic. With the 'Form Setting's section, you are able to control with width of the form over different device screens. Further information about bootstrap responsiveness can be found here.
Other Notes
- You must save m-Painter after applying your new layout in order to see the change at runtime.
- The Form Layout screen allows you to design the layout of your form. Any other HTML changes need to be performed in the main m-Painter screen.
