Overview
Bootstrap dictionaries support the use of Toggle Switches. To implement these, you must be using a Maintainer application. This post will walk you through how to add this to your maintainer form.
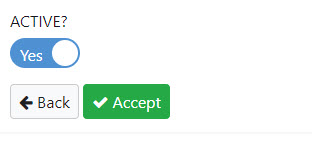
A visual of a toggle switch can be seen here. Toggle switches work for fields that have one of two possible values, such as ‘Yes’ or ‘No’, ‘0’ or ‘1’, ‘Male’ and ‘Female’, etc.
Implementation
In the Field Settings tab of your maintenance application, find the field that you would like to create a toggle switch for. This should be a field that only accepts two values (Yes/No, 0 or 1, Male or Female, etc.)
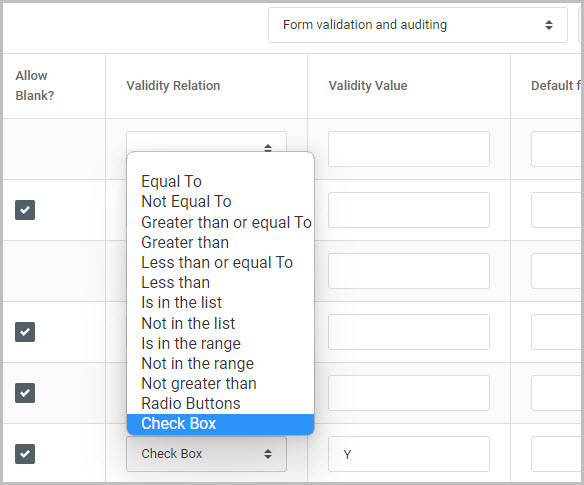
In the validity relation (‘Validity Rel’) column, select ‘CB’ for checkbox. In Validity Check Value, enter here the value you want to write to the database when the switch is toggled on.

Compile the application (if rebuilding an existing app, make sure to overwrite the HTML on the maintainer form). Open m-Painter and locate your field in your maintainer form page. There should be a checkbox here. Right-click on the row and use the ‘User Interface’ -> ‘Edit Element’ tool to bring up the HTML source.
By default, the checkbox and label will look like this:
<label>
<input ${checked('active',row.active,'y')}="" class="mrcinput" ${disabled('active')}="" id="ACTIVEY" name="ACTIVE" type="checkbox" value="Y" /> Y</label>
Change this to:
<div class="toggleSwitch">
<input ${checked('active',row.active,'y')}="" class="mrcinput" ${disabled('active')}="" id="ACTIVEY" name="ACTIVE" type="checkbox" value="Y" />
<label for="ACTIVEY"></label></div>After pressing ‘OK’ and saving your changes, you should visually see on the maintainer form at runtime the checkbox is now a toggle switch (If not, clear your browser cache completely and refresh the application)

