This tech blog post discusses information and instructions to modify m-Power to use Amazon’s Corretto 8 with m-Power. More information pertaining to Amazon Corretto can be found here.
For existing m-Power customers who would like to update their m-Power environments to use Corretto 8, the steps below will outline this process for a Windows installation.
- You can verify the vendor and version of your JVM (Java Virtual Machine) being used on your m-Power server from a command prompt editor. Directly on the m-Power server, run a command line editor as an administrator and enter:
java -version

- Download Corretto 8 from here by selecting the appropriate JDK download link that corresponds to the platform your m-Power installation is running on. For the purposes of this tech blog, I will be performing these steps on a 64-bit Windows machine and using the installer package file( .msi).
- Run the installer package and proceed through each of the prompted screens.
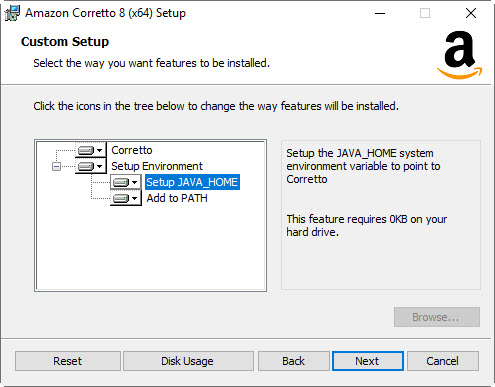
- Here I will not be preforming a custom setup, so simply selecting ‘Next’ will just confirm that I want to point the JAVA_HOME and PATH environment variables on my Windows server to Corretto 8.

Proceed through any remaining prompted screens and install Corretto 8.
- To verify that your Windows machine is now pointing to Corretto 8, follow the same instructions from Step 1 and now the Java version displayed should have a reference to Corretto:

- Next, you will need to manually point each of your Tomcat instances (development and production environment(s)) to use Corretto. From a command line editor as Administrator, navigate to the Tomcat /bin folder inside your m-Power environment.

As shown above, this example assumes my development m-Power is located in C:/Program Files/mrc/development…
- Once inside the /m-power/tomcat/bin directory, type the following command:
tomcat9w //ES//TC9DEV
where TC9DEV will be the name of your Tomcat service.
- In the window that pops open, toggle the Java tab and change the Java Virtual Machine path listed to the jvm.dll file, making sure it now references the folder path where you installed Amazon Corretto.

Once done, press ‘Apply’ to save your changes.
- Restart the Tomcat service, and it is at this point m-Power is using Corretto. To verify, open a web browser directly on the m-Power server and enter the following in your URL address bar to access the *Tomcat Manager:
http://localhost:8011/manager
At the bottom of this main page, Tomcat will display the current JVM Version and Vendor.

*The default credentials for the Tomcat Manager is ‘mrcuser’ (without ” marks) for both user and password.
- Repeat steps 6-9 as needed for each of your production instance(s).
- Once the steps have being completed for each Tomcat service, please reboot the Windows server completely.
-
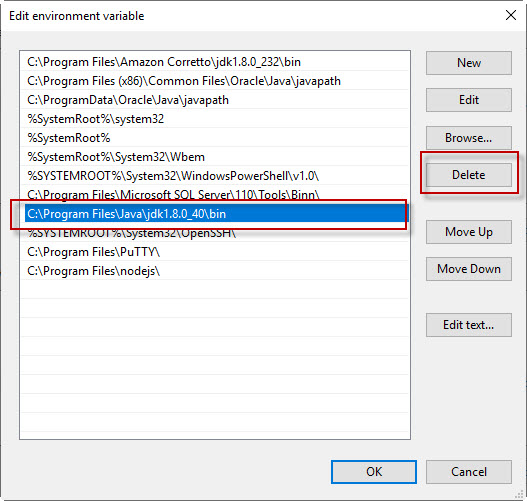
(Optional) *Please review and confirm there are no other applications or processes on your Windows Server that are referencing the location to the Oracle JDK before removing it from the Path*. Now that your m-Power server is using Amazon Corretto, you can remove references to Oracle JDK from your Windows Environment Variables path, as this will no longer be used by m-Power. From “My computer” go to “Properties”. Click Advanced (tab) and go to Environmental Variables. In the system variables edit the “Path” and select “Delete” on the path to Oracle JDK. Note that these changes to the Windows Environment Variables will require a reboot of the Windows server completely to ensure these changes take full effect.

