Creating applications that support Parent/Child architecture (also known as Header/Detail) is a common task for m-Power developers. This feature aims to greatly simplify the development/customization effort of creating these types of applications. A few examples of Parent/Child applications include:
- Order Entry, where Billing/Shipping is stored in the parent, and order lines are in the details.
- Expense Forms, where employee information is stored in the parent, and expense lines are in the details.
- Enrollment Applications, where user information is stored in the parent, and all of their selected courses are stored in the details.
In short, any application that would require you to have a one to many relationship would be a great candidate for this Parent/Child feature.
Features
Creating your Maintenance applications using the Display & Maintain template using the Parent/Child feature, enables numerous features, including:
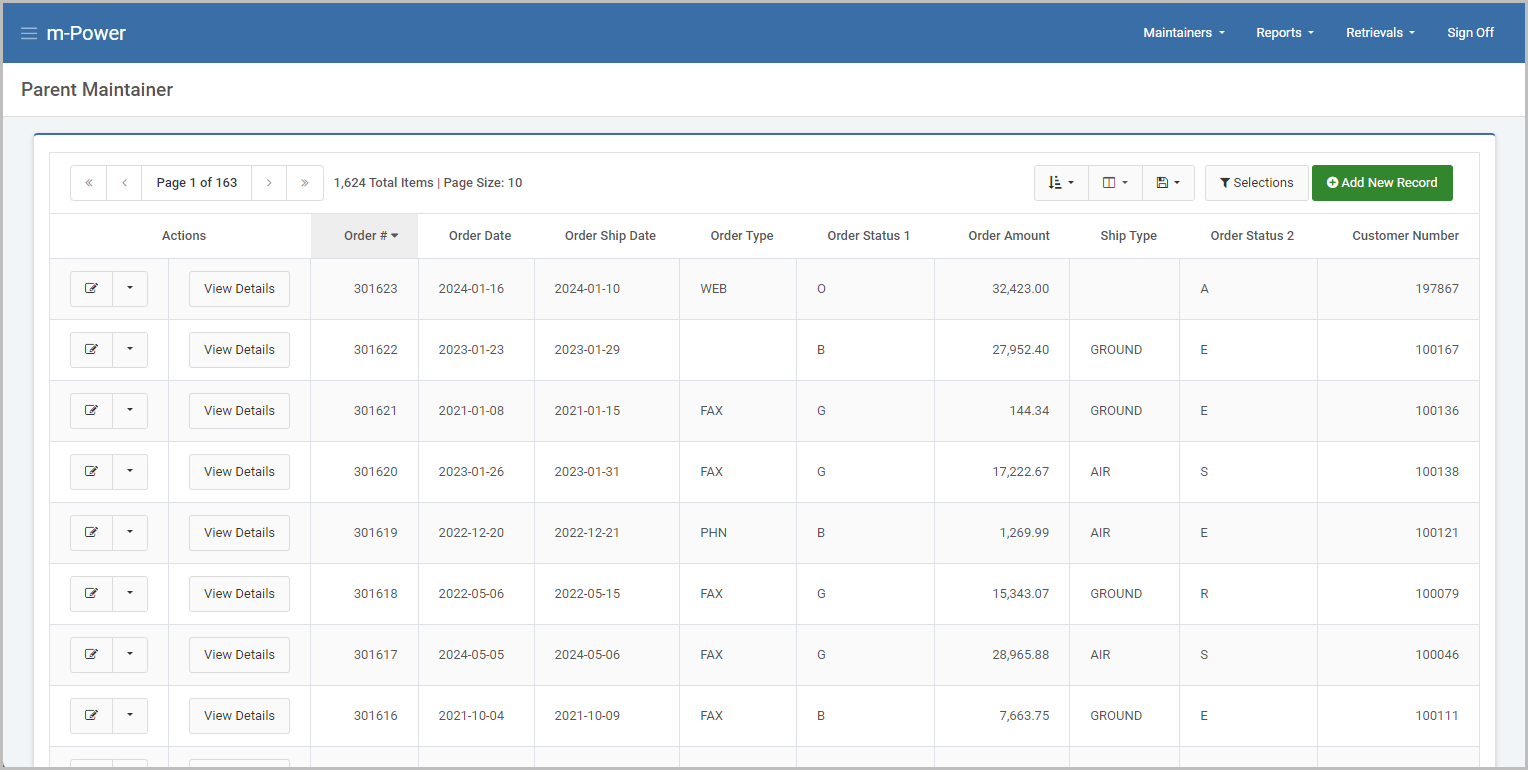
- Automatic linking of application at run-time. Each parent record will include a link that allows users to view the Child information belonging to the Parent.
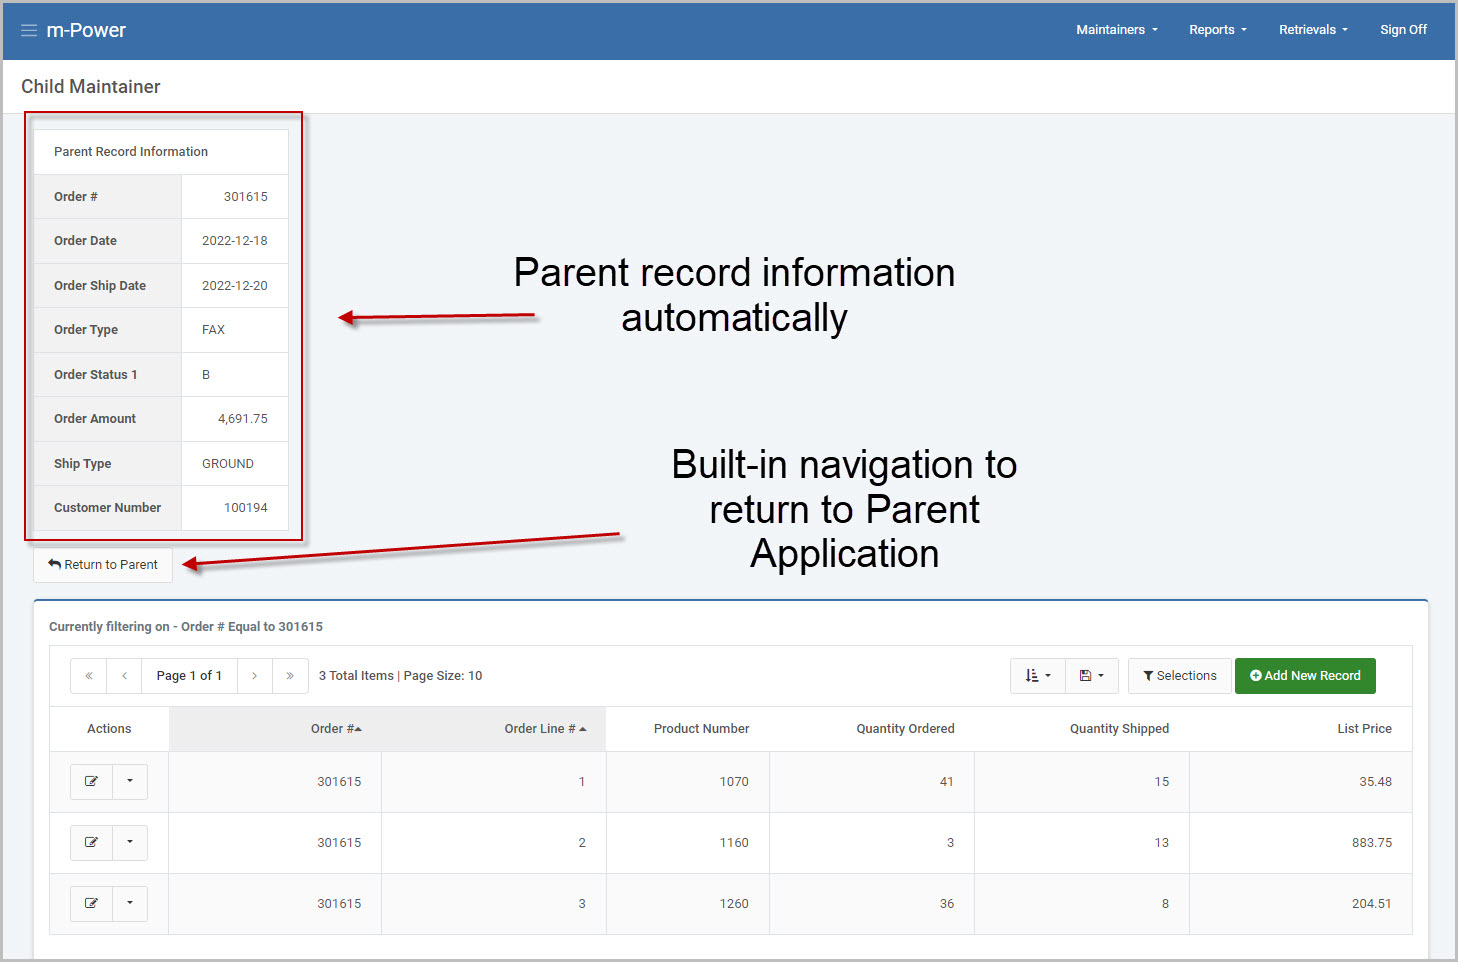
- The Child review screen will include a link to return to the Parent.
- Inclusion of Parent information on Child screens
- Auto-delete of Child records when Parent is deleted
- Auto-copy of Child records when Parent is copied
- Auto-Redirect to add new Child immediately upon creating Header
Video Documentation
Implementation
Create Parent Application
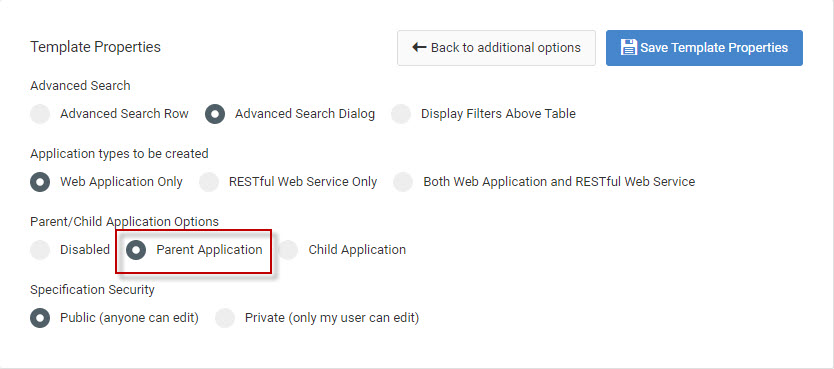
Create your Parent Application over the necessary tables using the Data List with Web Form template. Prior to compiling, navigate to the “Additional Options” -> “Template Properties” section. At the bottom, be sure to set the “Parent/Child Options” value to “Parent Application.”
Create Child Application
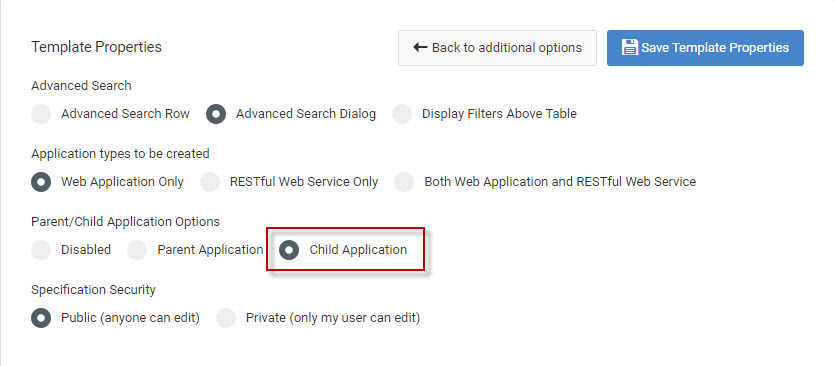
Create your Child level Application over the necessary tables using the Display and Maintain template. Prior to compiling, navigate to the “Template Options” section. At the bottom, be sure to set the “Parent/Child Options” value to “Child Application.”
Edit Parent Application
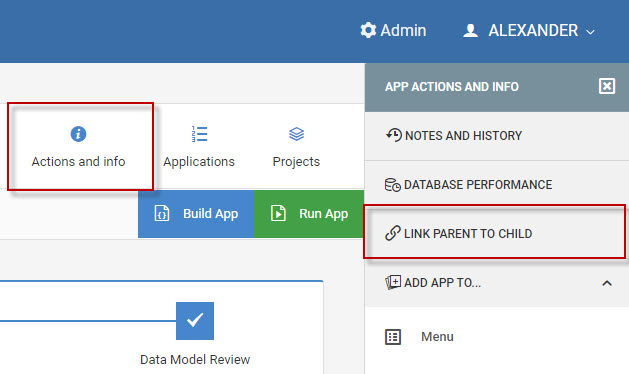
Return to your parent application. Click on the “Actions and info” -> “Link Parent to Child” link. This is what will bind the two applications together, passing the necessary fields.
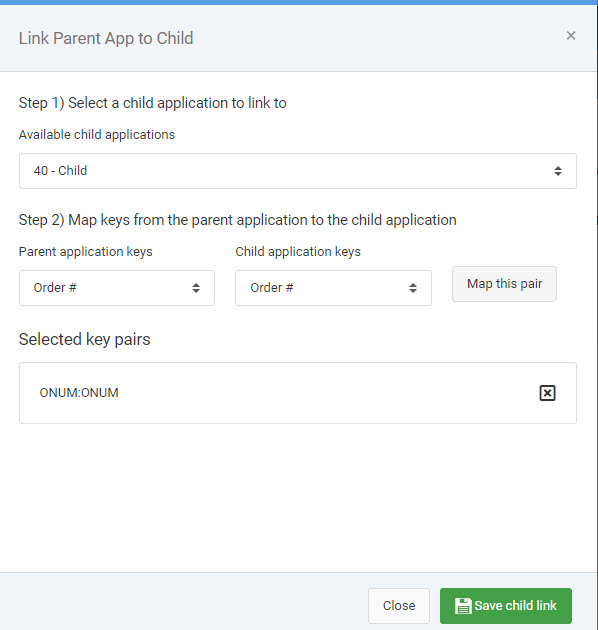
Select Child — Use the drilldown to select the necessary child.
Configure Parameters — Use the interface to select the field(s) from the Parent and Child applications that should be linked. For example, if the Parent and Child record utilize Order # as the common link between them, choose both (see image). However, if your case required more than one field (such as Company #), feel free to add as many fields as necessary.
Runtime Usage
The Parent Application contains a new button that allows users to see Child records that pertain to the user
The Child Application contains Parent information above the Child records as well as a button that allows users to return to the Parent screen
Additional Configuration
Edit Properties
There are three configurable options that are included with this feature, all accessible via the Application Properties of the Parent application, under the “Parent” tab.
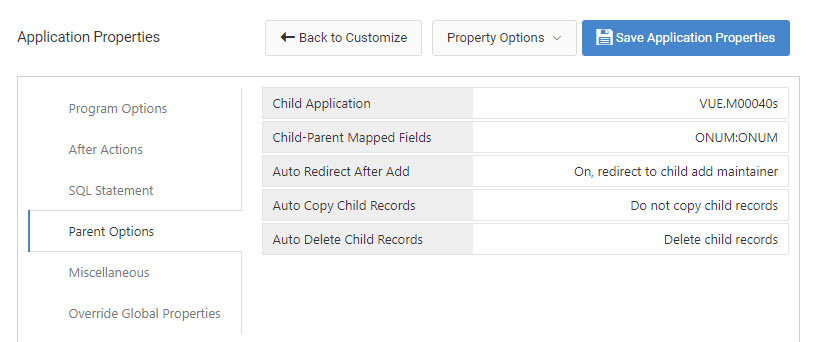
- Auto Redirect After Add — Redirect to Child is the default. When ‘Redirect to Child’ is set, the application will automatically redirect the user to add a Child record after they have added a new Parent Record. However, if “Normal Redirect” is set, when a Parent record is added, the application will simply return back to the Parent maintainer.
- Auto Copy Child Records — Off by default. When enabled, in the event that a parent record is copied, all associated child records will also be copied
- Auto Delete Child Records — On by default. When enabled, this will delete all child record associated with the parent when the parent is deleted.
Quick Add
An additional configuration is being able to update a parent record and simultaneously add/delete a child record all from the web form screen of the parent app. This feature is called the Quick Add feature and this documentation will cover how to use this feature in your parent/child maintainer setup.
